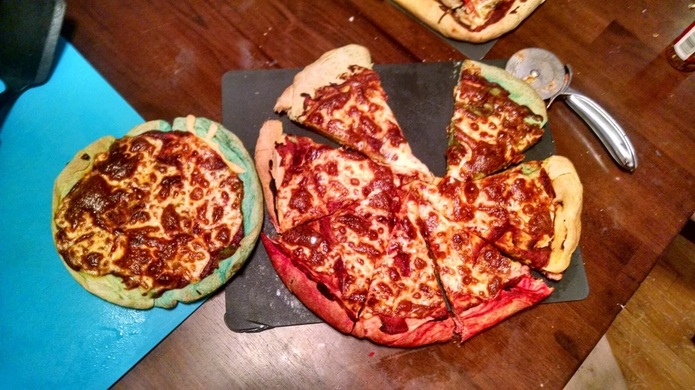
 Not all fermentation happens in beer around here. The word fermentation (in the food sense) refers to the conversion of sugars into acids by bacteria, yeast, or molds. In general, we prefer controlled fermentation in our food (though there are exceptions), as wild fermentation can lead to both bad flavors and some very nasty by-products. Fermentable 1: Bread Yeast My experiments with fermentation actually started with bread, which -- as you history buffs might know -- is either the precursor or successor to the earliest forms of beer. As a child, there were a few days a year when my mother would bake. I distinctly remember povitica and hot cross buns. She baked other loaves as well, perhaps more regularly than I remember. Everything about that process sticks in my memory: the enormous ceramic bread bowls with the blue stripe near the rim; the flat white bread towels that she used to lay over the dough to let it rise; the pull-out cutting board where she would turn out the dough and let us punch it to our heart's content. I remember slicing a cross at the top of each hot cross bun, baking them until they were golden, and drizzling barely-thinned confectioner's sugar glaze into the depressions. I loved the crisped raisins that sometimes got stuck on the tips of the crosses, little burnt ends of the fruit world. In grad school, I baked relatively frequently, my process far more slapdash than my mother's meticulous recipes. Her baking always came out "right", or at least very close to it. My baking was an experience of a different sort, an experiment in the effects of putting in more yeast or more butter or eggs or milk. I didn't follow recipes because I didn't care. My baking was simple, always loaves in loaf pans, rarely eaten by anyone but me. These days, most of my baking is in the form of pizza crust, which I regularly make using the following recipe: In a bowl, mix 2 cups flour, 1 Tbsp active dry yeast, 2 tsp salt. Heat 2 cups water to ~105F. Pour water over flour mix. Add 1-2 Tbsp olive oil. Stir the heck out of this mixture with a wooden spoon until it's smooth, something like 3 minutes. Add flour until it thickens to a dough texture. Turn out on a board and knead for 8-10 minutes. Oil a bowl, put the dough in the bowl, cover, and let rise in a warm, wet place for 40 minutes. Pinch off sections, roll them into pizza shapes. Par-bake the dough at 400F until it's hardened before topping. Since it's made at home, you can also split the dough into portions and add fun colors, either using natural juices or terrifying drops of FDA-approved food coloring.
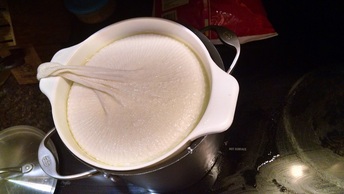
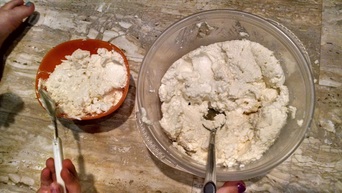
1. Heat milk (any fat content will do; the fat will end up in the final product) to ~180F to kill whatever native bacteria might be present. 2. Cool milk to 110F. 3. Add yogurt that has live, active cultures. Note that almost every yogurt advertises this, but I suggest using those with little to no flavor or additives to ensure that the bacteria are in optimal health. 4. Wrap this up in blankets, towels, or whatever else might be handy to keep it at 106-110F. 5. Wait 5-7 hours. The temperature should have held quite well if you wrapped it decently. 6. Strain the result through a cheesecloth, grain bag, or a clean towel. One of my mom's pristine white bread towels would have done well, but I live in a brew-heavy house, so it got the grain bag treatment. Let it strain naturally -- don't squeeze the liquid out -- for 6-8 hours in the refrigerator. You now have yogurt. And some weird yellow liquid that seems like it's going to taste lousy. But don't let that fool you! This is the infamous Little Miss Muffet fare whey, which has a weird urine-like color and an intriguing lemony flavor as well as some of the tang of the yogurt itself. Set this aside, because it's time to have some fun. 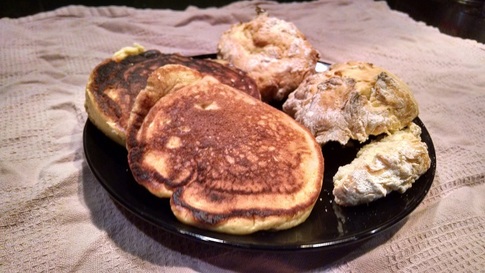 By-Product 2: Whey Whey is acidic. Like buttermilk, this means it can be used in various breads as the acid part of the {acid}-baking soda pairing. I suggest you use it as a buttermilk substitute to make things like biscuits and pancakes. Because really, who doesn't want whey-based biscuits and pancakes? For example, see the biscuits and pancakes I made with it? You may note the slight yellowish tinge, which is, of course, from the pee color of the whey. But remember that the whey does not taste bad. I repeat: It does not taste bad. Anyway, that's just an example of what you can do with whey. A note about whey, though. Obviously its texture is different from buttermilk, so it behooves you to find something thick -- for example, some of that fresh-made yogurt -- to add to your recipes to recover some of the desired thickness of your original product. Lightly fatty milk (you may have to go to 2% here) will also work and not add any extra yogurt tang. Experiment & enjoy! By-Product 2: Whey (Redux) In addition to being useful as a bread ingredient, whey can also be used as a starter to your next yogurt. Add 2-3 cups of the stuff (making sure there's some yogurt matter in there as well) to your next batch once it's hit 110F and you're good to go. I don't know how long whey will keep, and I don't know if you can revive the bacteria after freezing, but if you continue to make yogurt, there should be no problems with the bacteria. Mash out. Spin on.
0 Comments
Leave a Reply. |
AuthorA bike-riding brewer. Archives
September 2016
Categories
All
|
 RSS Feed
