|
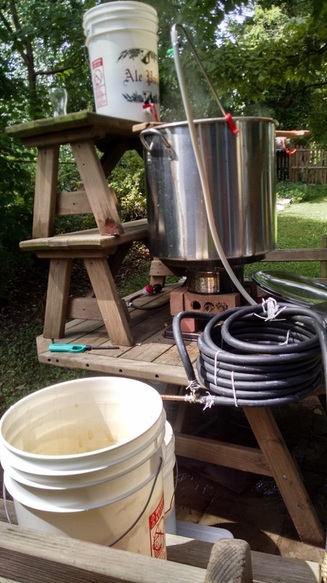
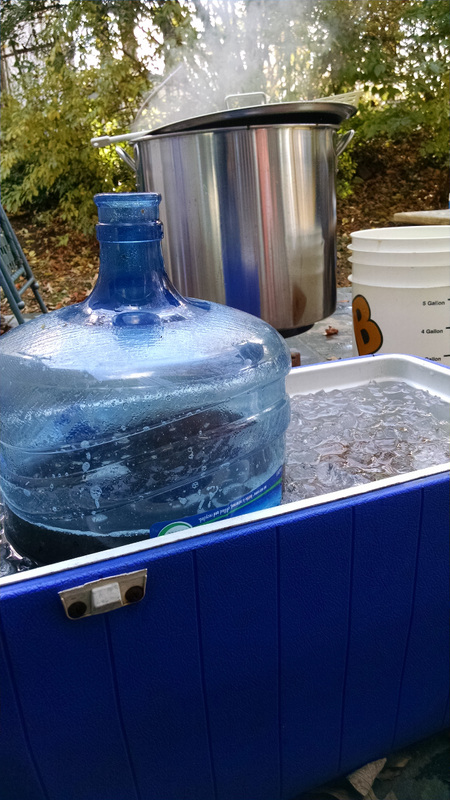
So I signed up for a 50k run. It was sort of on a whim, and if you're reading "Running: The Exciting Book" in the other tab, you may or may not find these long runs there. Wait, let me check...nope, haven't reached it yet. But it'll get there. The race is called the West Virginia Trilogy, and I had been looking at it for a few weeks. As the deadline to sign up without paying an extra $20 was approaching, I hemmed and hawed and talked to my wife and tried to think of a way to get to West Virginia (Circleville, to be precise) without totally screwing her over in kid duty. Ultimately, it was my brother who came through, volunteering to drive me out there on a Thursday evening, camp out that night, and take me back Friday evening. Yep, the 50k is a rare Friday event, knitted up with a 50-miler on Saturday and a half marathon on Sunday. But three days -- too much. I went for the lone day of the 50k, figuring it wouldn't be excessively abusive. As well, the kids don't have Friday activities, and my wife will go to work that day, so disappearing for the evening before and that day is less like a 24-hour event and more like a 16-hour event. At least, that's how I justified it to myself. Regardless of the motivation, I also decided it had been too long since I'd brewed. As the DC area heated up during the summer, I had less and less motivation to sit in front of a hot stove, and given everything happening in our house, it seemed like a bad idea to spend 10 hours just to make another half dozen cases of beer. August started to wind down, a mild "cold" front moved in, and we finally saw temperatures in the 70s. I jumped at the opportunity, my job having relaxed a bit for a few weeks. But what better way to celebrate a three-stage race than with three types of beer? So it was that the idea of the "Porter Triptych" was born: three variants on a porter, ready for race day. First up is the base, which I modified from an existing recipe brewed a couple years ago. This was modified in a few key ways: (1) To better use the ingredients I had on hand; (2) to use grains that simply weren't available when I brewed it last; and (3) to make a better product.
0 Comments
I could write this post in German, but that would be both difficult and probably terrible for any readers out there. Yes, I know most of you are just stumbling on this blog because Google told you it had a recipe for a beer of some sort. But for the faithful -- and I'm convinced there's at least one faithful reader out there, because otherwise I wouldn't bother at all -- I'll assume that while you're willing to read English dreck, your desire for German Dreck is less certain. To this week's brew! Inspired by a local homebrewing club event, I decided to do an altbier, a German style associated with the Rheinland -- basically east-central where Germany, the Netherlands, and Belgium meet. Altbiers are unusual for the traditional continental brews in that they're ales, meaning they're "high-temperature" fermented; in this case, the fermentation temperature is 60-65F, somewhat above the mid-50s lagers that are predominant in much of Germany. The aim here was to produce an extremely simple altbier while also clearing out some stores of grain that had begun building up in the basement. As a result, I modified the recipe given to me by another homebrewer to come up with a slightly more complicated version. The "simple" version, of course, does away with the base malt variety and goes straight to pils. I probably would have also picked a saaz hop to go on top, but since I had 10.5 oz of Tettnang from October, I decided that would have to do.
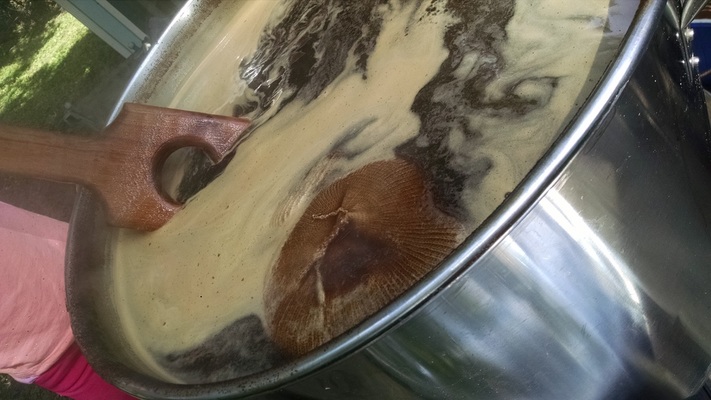
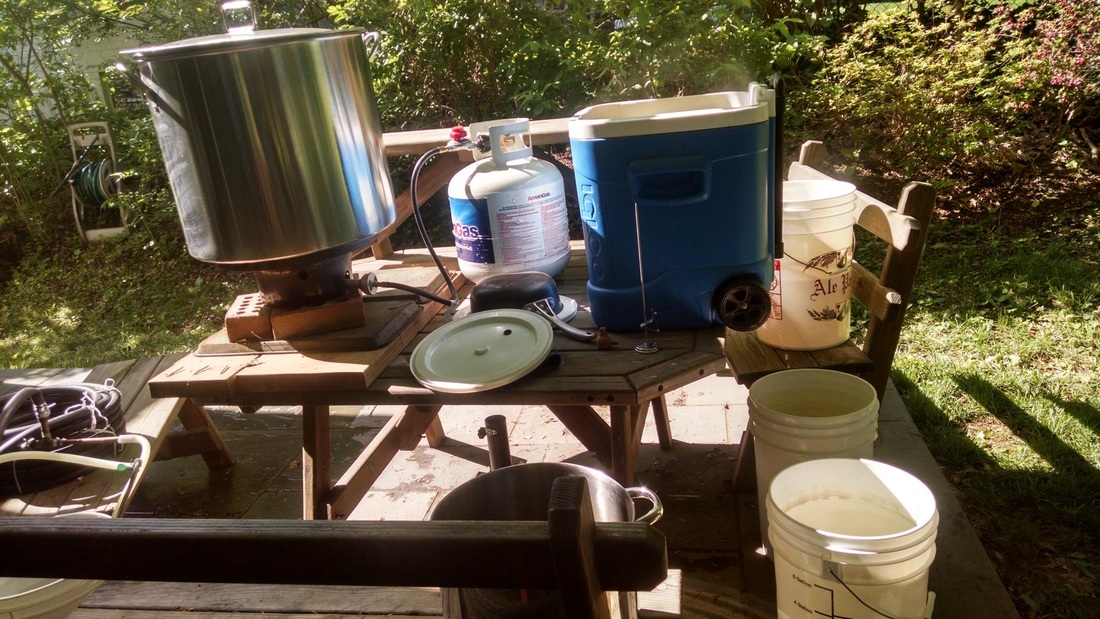
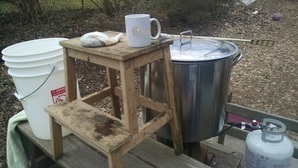
Today's helper was my youngest daughter, who is approximately 1/3 the size of the 20-gallon pot. She and a couple of her friends could easily turn that thing into a fort. Alas, in this case that potential fort was flooded with 18 gallons of beer, so instead she took up the paddle and stirred away happily, which is a heck of a lot more than most 4-year olds would do. Altbier
It doesn't happen often that I make more than a minor brewing mistake -- something like being late on a hop addition, or mashing in a little cold. Unfortunately, with my Roggenbock, I pitched at 64F with the intention of bringing the temperature down quickly. Instead, I forgot about that, put the beer behind the partitions, and finished off my work day -- and almost three subsequent days -- without thinking about the fact that it needed to be chill-fermented. By the time I got back to it, fermentation had started in earnest. Now I'm concerned about off flavors, but there's nothing to do about that except wait. Fortunately, I've read that WLP835 is pretty temperature-stable up to the low 60s; it also needs a diacetyl rest at the end anyway, so that should clear things up a bit at the back end.
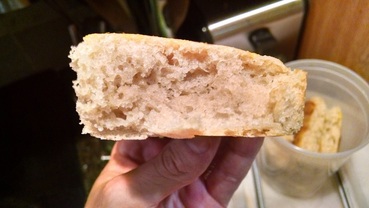
Ultimately, there's so much that can go wrong in homebrewing, it's useful to know how to fix common problems, or recognize those that don't need fixing. Here are some process and production issues and how to deal with them, sorted by the part of the process you will experience them. Grinding Stuck grinder -- Unload the hopper, work through the problem, and slowly reload while grinding. Usually the sticking is caused by a small stone (or other physical impediment) or a rusted cylinder. Obviously, physical blockages should just be removed. Rusted parts need to be taken off and cleaned/relubed individually. If it's a part you don't want to remove -- which is most of them on a typical grinder -- wrap a paper towel around the cylinder on the inside and spray some WD40 on the exterior, then run the grinder through slowly a few times. Remove the paper towel, and you should be good for another six months of grinding. Unground barley -- This is especially problematic if you've run the grinder backward, which usually throws the malt down the outside of the cylinders and does not actually grind them. To separate the good from the bad and regrind only the bad, you can usually bang on the outside of the storage bucket until the ground stuff falls to the bottom. Skim as needed. Alternatively, you can do this process scoop-by-scoop in the grinder hopper, banging out the ground grain until all that's left is unground, then grinding that in the normal manner. I've never done the latter, preferring a few overground grains to a big pile of annoyance presented by the second. Mashing Completely full mash tun -- I use a 15-gallon cooler as my mash tun, and a 20-gallon batch typically fills it most of the way up. If you're smart about it before you start mashing in, you can split the mash up into 2 segments, pouring in ~50% of your desired water on 1/3 of the grain (i.e. a very thin mash). This is easy to stir, and you can then add ~20% at a time of water, then corresponding percentage of grain, until you're done, stirring completely at each step. If you didn't think about it beforehand and are looking at most of your grain in the mash tun as well as only part of your water, it's a little harder to recover from. In this case, take large scoops out and put them in any spare container you have, removing up to half the volume of the tun; then add whatever water you can until the mash is sufficiently thin to stir. Now add back the grain stagewise, as though you planned it that way in the first place. Low temperature -- This one is much easier than the next (high temperature). I always plan for a low temperature by mashing relatively thick; it's easier to add boiling water and warm the whole thing up than to do anything else. You can also treat this like a decoction mash: scoop out large volumes of mash and boil them. This may degrade the boiled portion, but that degradation is a small price to pay for the mash actually, you know, working out. Just be sure to do the calculations before any of this, lest you suffer from... High temperature -- Ice cubes are easiest. Encased freezer packs also work, but many of these aren't heat-tolerant, so I caution against using them. I've used a couple other methods in the past, none of them particularly fun. First, drain your wort -- immediately. Let the outgoing liquid cool a few degrees below what you want the mash to be, then re-introduce it. If it hasn't been overheated for too long, most of the enzymes will be intact and you'll still get full action from your wort. Sparging Stuck sparge -- Most annoying of all, and there are plenty of alternatives out there. I've had to empty my mash tun before, which is a process that just kills a regular brew day, but recovery is fortunately easier than it seems like it could be. Once you've unblocked your drain, you're ready to re-introduce the mash. First off, thin your mash! Empty the tun into buckets or other container. Next, add back a small volume along with some sparge water. You're going to have to continuous sparge for a little while (or you can just do the whole thing), so get ready for a loss of 45-60 minutes. Happily, the process isn't that bad, it just takes some babying. Add more mash, add more liquid, etc., until the mash is back in and flowing ok. If you're a batch sparger, do your normal 2 or 3 runnings, but stop the runnings at the volume you originally expected. It's going to be fine. Long drain -- Usually the draining process takes 10-20 minutes at most if you're batch sparging, or up to an hour for the whole process if you're continuous sparging. If the drain takes a long time, it does not harm the beer, but it can still be frustrating. If you're suffering from a long drain on a batch sparge, consider doing a continuous sparge. You can do this midway through simply by adding liquid while the drain is going on. The thinner mash will drain a little quicker, and though the end result might not be significantly faster, it should save a little bit of time. Also note that you can continue to pour water into the mash as you approach the end of the draining process if it will keep the pressure up. Cooling Slow chill -- It's imperative that you chill the wort quickly once it's done boiling, and there are really no good shortcuts. If you don't have enough ice, you're kind of boned unless the ground water is cold. With a counterflow chiller, you can get the cooling needed on 5 gallons in a matter of 20 minutes without problems if the incoming water is sufficiently cold. For counterflow chilling, note that the flow rate on each side should be similar to minimize waste water and offer significant cooling. (Handy tip: Use the hot waste water to wash up -- you'll finish cleaning much quicker that way.) If you don't have a counterflow chiller or a plate chiller or a coil chiller, note that cooling is all about surface area, conductivity, and temperature differential. You can wrap your plastic output tube around something metal and shove it into a bucket of ice water. I've used a copper pipe as the core and zip ties to hold the wound-up tube. Fancy hint: braid your zip tie between the tube turns to increase surface area. Stuck chiller -- Depending on the size of the output, you can also get a stuck chiller from the protein precipitating out of the wort. I have no good solution to this except to blow out the tube in reverse and start again. The time it takes to chill is far longer if your chilling mechanism is plugged up than if you just stop and fix the issue to begin with. Fermenting High temperature -- High temperatures can be beer killers. Put your fermenter in a disposable turkey roasting pan (they're large and flexible), add ice or ice packs, and put an old shirt on the fermenter (as in, dress the bucket or carboy). Be sure the bottom of the shirt is exposed to the water, pour some water over the top of the shirt, and turn on a fan. Add ice or ice packs to the water once if not twice a day, and be sure to swap shirts every two days -- those things turn manky. You'll also need to replace the water (it turns manky too) or add iodine salts to ensure it stays sterile and doesn't start growing disgusting crap. Low temperature -- In the winter, low temperatures are common. You can usually deal with this early on by wrapping the fermenter in a blanket, as the internal heat of fermentation will increase the pre-fermentation temperature by a couple degrees naturally; keeping this heat in can raise it by upwards of a dozen degrees (F) without effort. For a longer-term solution, or later in the fermentation period, and if you can't put the fermenter in a warmer place in the house (like if you don't want a fermenter sitting in your tiny New York City living room or something), give your fermenter a hot bath or shower. Your 120+ F water can easily increase the temperature in your fermenter. If you're more adventurous and trust your sanitizing methods, pour a gallon or more of the fermenting brew into a pot and, stirring constantly, raise its temperature by the amount you think you need. By stirring constantly you won't burn your beer and you'll get consistent heat distribution through the liquid. If, for instance, your beer is at 60F and you need to ferment at 68F, you can heat 1/4 of the liquid to 90F without a problem; the resultant beer temperature should be around 68F. Repeat if needed, but remember that every time you open the fermenter you have the potential for infection. Bottling Out of bottles or caps -- Any bottle works, including wine bottles. Indeed, wine bottles are much easier to come by than old beer bottles that are homebrew-appropriate. If you get a wine bottle, use a small piece of wood to hammer the cork back in after you've filled it. Complete the seal by pouring wax around the rim and over as much of the top of the cork as possible. This will make the seal air-tight. Drinking Beer down the shirt -- Don't spill beer! 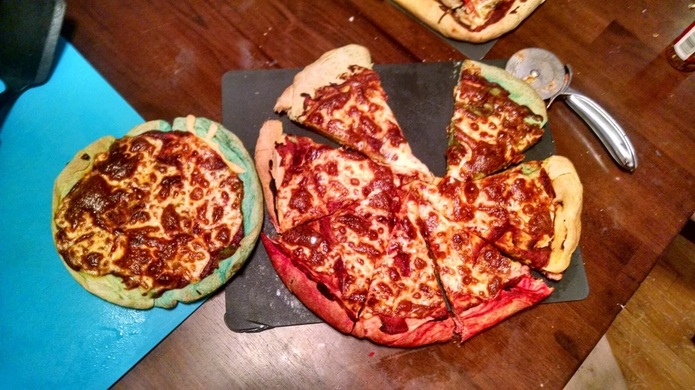 Not all fermentation happens in beer around here. The word fermentation (in the food sense) refers to the conversion of sugars into acids by bacteria, yeast, or molds. In general, we prefer controlled fermentation in our food (though there are exceptions), as wild fermentation can lead to both bad flavors and some very nasty by-products. Fermentable 1: Bread Yeast My experiments with fermentation actually started with bread, which -- as you history buffs might know -- is either the precursor or successor to the earliest forms of beer. As a child, there were a few days a year when my mother would bake. I distinctly remember povitica and hot cross buns. She baked other loaves as well, perhaps more regularly than I remember. Everything about that process sticks in my memory: the enormous ceramic bread bowls with the blue stripe near the rim; the flat white bread towels that she used to lay over the dough to let it rise; the pull-out cutting board where she would turn out the dough and let us punch it to our heart's content. I remember slicing a cross at the top of each hot cross bun, baking them until they were golden, and drizzling barely-thinned confectioner's sugar glaze into the depressions. I loved the crisped raisins that sometimes got stuck on the tips of the crosses, little burnt ends of the fruit world. In grad school, I baked relatively frequently, my process far more slapdash than my mother's meticulous recipes. Her baking always came out "right", or at least very close to it. My baking was an experience of a different sort, an experiment in the effects of putting in more yeast or more butter or eggs or milk. I didn't follow recipes because I didn't care. My baking was simple, always loaves in loaf pans, rarely eaten by anyone but me. These days, most of my baking is in the form of pizza crust, which I regularly make using the following recipe: In a bowl, mix 2 cups flour, 1 Tbsp active dry yeast, 2 tsp salt. Heat 2 cups water to ~105F. Pour water over flour mix. Add 1-2 Tbsp olive oil. Stir the heck out of this mixture with a wooden spoon until it's smooth, something like 3 minutes. Add flour until it thickens to a dough texture. Turn out on a board and knead for 8-10 minutes. Oil a bowl, put the dough in the bowl, cover, and let rise in a warm, wet place for 40 minutes. Pinch off sections, roll them into pizza shapes. Par-bake the dough at 400F until it's hardened before topping. Since it's made at home, you can also split the dough into portions and add fun colors, either using natural juices or terrifying drops of FDA-approved food coloring.
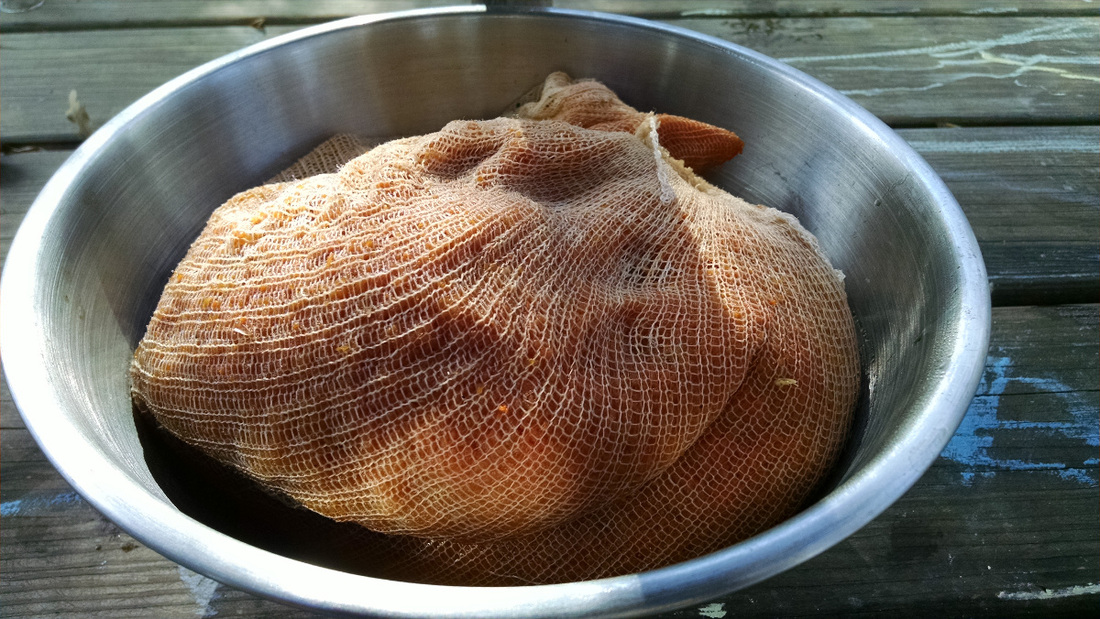
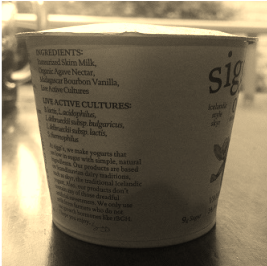
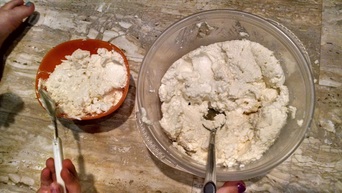
1. Heat milk (any fat content will do; the fat will end up in the final product) to ~180F to kill whatever native bacteria might be present. 2. Cool milk to 110F. 3. Add yogurt that has live, active cultures. Note that almost every yogurt advertises this, but I suggest using those with little to no flavor or additives to ensure that the bacteria are in optimal health. 4. Wrap this up in blankets, towels, or whatever else might be handy to keep it at 106-110F. 5. Wait 5-7 hours. The temperature should have held quite well if you wrapped it decently. 6. Strain the result through a cheesecloth, grain bag, or a clean towel. One of my mom's pristine white bread towels would have done well, but I live in a brew-heavy house, so it got the grain bag treatment. Let it strain naturally -- don't squeeze the liquid out -- for 6-8 hours in the refrigerator. You now have yogurt. And some weird yellow liquid that seems like it's going to taste lousy. But don't let that fool you! This is the infamous Little Miss Muffet fare whey, which has a weird urine-like color and an intriguing lemony flavor as well as some of the tang of the yogurt itself. Set this aside, because it's time to have some fun.
 By-Product 2: Whey
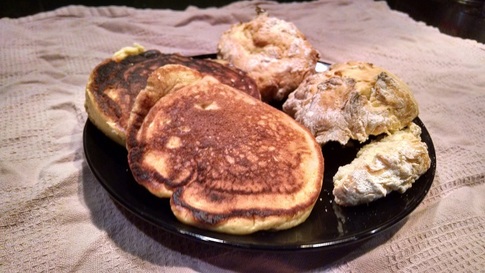
Whey is acidic. Like buttermilk, this means it can be used in various breads as the acid part of the {acid}-baking soda pairing. I suggest you use it as a buttermilk substitute to make things like biscuits and pancakes. Because really, who doesn't want whey-based biscuits and pancakes? For example, see the biscuits and pancakes I made with it? You may note the slight yellowish tinge, which is, of course, from the pee color of the whey. But remember that the whey does not taste bad. I repeat: It does not taste bad. Anyway, that's just an example of what you can do with whey. A note about whey, though. Obviously its texture is different from buttermilk, so it behooves you to find something thick -- for example, some of that fresh-made yogurt -- to add to your recipes to recover some of the desired thickness of your original product. Lightly fatty milk (you may have to go to 2% here) will also work and not add any extra yogurt tang. Experiment & enjoy! By-Product 2: Whey (Redux) In addition to being useful as a bread ingredient, whey can also be used as a starter to your next yogurt. Add 2-3 cups of the stuff (making sure there's some yogurt matter in there as well) to your next batch once it's hit 110F and you're good to go. I don't know how long whey will keep, and I don't know if you can revive the bacteria after freezing, but if you continue to make yogurt, there should be no problems with the bacteria. Mash out. Spin on.  Wheat! Oh, you crazy grain. You who demand harvest and threshing and grinding, and have become our most common bread grain. To Americans, wheat recalls summer through those classic images of large but trim and well-dressed Midwestern farmers driving their wide-body tractors through fields of glimmering, golden grain, backed by a pleasantly warming sun, the stalks bent by a hint of wind. For those who have lived in the Midwest, of course, this image is laughable, as the reality is that the pleasantly warming sun lives in April and May, when the cracked and broken remains of last year's crop have been turned up and covered in manure -- with all the sensory interest that entails -- so that this year's crop can emerge swiftly from the earth. The tractors come out in mid-summer, and the farmers who tend their crop aren't wearing a set of pristine coveralls and a flannel shirt, but have stripped their work shirt off and are covered in sweat and gnats, their scuffed work boots coated in mud and manure, their hat brims frayed. 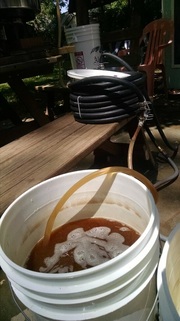 Be that as it may, I hereby bow to this mysterious summer exaltation of wheat, as well as to my wife's predilection for a blueberry wheat I brewed a couple years ago for my sister-in-law's wedding. A note, though, about the process here. I rarely brew wheat beers, as I find wheat beer yeasts somewhat fussy. While many feel that "typical ale" yeasts present opportunity for "off" flavors -- which they do over a range of temperatures -- most wheat ale yeasts are harder to manage in my setup. At lower temperatures -- in the mid-60s -- they might act like US05 (a neutral yeast at temps from the low-60s to about 71F); at higher temperatures, though, banana and clove and citrus and other strange scents and flavors manifest. These higher temperatures start from the high-60s, and they build aggressively. Last time I brewed the blueberry, it wasn't technically a wheat, it was a witbier. The difference? The type of wheat used, the type of yeast used, plus the active addition of citrus and coriander to the wort at or near flameout in the wit. Blueberry took over that flavoring, lending a wonderful smell without the fruit sweetness (it's fermentable sugar too!) -- which had to be added back in during bottling. This time, I didn't want to go through the witbier spicing. I wanted citrus without the banana and clove, but I also prefer a relatively clean product with a little bit of wheat backbone and yeast falling out to give some haze. With no further ado, then, I present the summer wheat series:
 Just a quick note about the rye bock and rye pale. My wife is not particularly interested in "rye pale ale", as she's found many of them exceedingly spicy and not inviting. In this case, though, the spice was quite mild, almost like the ale had been hit by a shot of Cascade and Warrior at the end of the fermentation.
The bock also has that little spiciness, which is useful in a subtle malt-forward brew. Since the bock isn't an explosion of malt but rather a light pinch of that flavor -- relying instead on the balance of malt and hops to make for a full but clean taste -- that extra spice offers an extra dimension: the sweet malt, the floral hops, the spicy but not acidic rye. What was more interested was the fullness of both beers. The rye malt clearly gives both a more substantial mouthfeel. The rye carries some starch, and it feels like even more than oatmeal in an oatmeal stout. On the other hand, while some beers feel like a meal because of this, the rye bock just has a pleasant completeness, while the rye pale has something that cuts somewhat through the hop bitterness. I think I'll be using rye again in a beer, with some caveats. Because of the spice, it's very easy to overwhelm the natural flavors of the rest of the brew, so it's important not to add spicy hops to the mix. Make your hops floral or, if using something very bitter, stick to neutral flavors. Another note about the rye. I let this one ferment in an odd way because I couldn't stabilize the temperature well. Instead, it would ferment from 55F down to 48F, then I'd let it come back to 55F in about a day to repeat the cycle. This took a while to work through, as at 48F the yeast are a essentially inactive. This left the full span of produced flavors from the yeast, which worked out fine in this case but probably could have been improved with some stability. On the plus side, this repeated heat-and-cool cycle led me to a new solution, which was to make a mini-fridge in my fridge surrounding the cool air vent shaft and the refrigerator temperature sensor. Hopefully on my next brew this will give me a better way to regulate temps without resorting to an in-line device -- one that may have negative consequences for the freezer that lives in the top half of my lagering fridge. Mash out. Spin on. 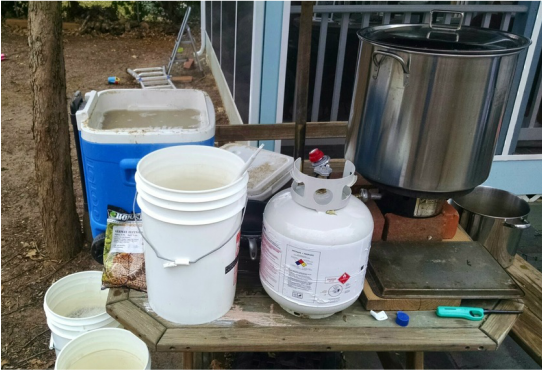 Even the name of the month "May" brings to most brewers' minds a single beer style: Maibock. This strong, lagered beer was generally served in Spring and has a paler complexion than its longer-lagered (and older) brethren. But it's been done. Enter the roggenbock, an invented style that melds the traditional bock (copper color, malt-forward and medium-bodied but not sweet, with just a hint of hops) with a rather American desire to shove rye into things. Indeed, the malty and non-sweet character of the bock seems to lend itself to the addition of a little spice from rye. In a surprising twist, this brew day went almost perfectly. I ground the grain a couple days before (not ideal, but it's when I had time), mashed in at 7:30, and was finished with the boil by 12:30. By 2:00, everything was cleaned up. That's the kind of efficiency the brewing calculators can't measure. Without further ado, the recipe!
This actually produced ~12-13 gallons of Roggenbock, with another 5.5 gallons used to make what I've called "RogAle", using Wyeast American Ale (1056) and adding 1 oz Hallertauer at flameout. RogAle will also get 2 oz Tettnanger and 1 oz Hallertauer on transfer to the secondary. This will make it a little more floral, but still spicy (I don't want to overwhelm the rye inclusion here with hop bitterness or spice). Mash out. Spin on.  Months away from this blog, I'm finally getting back to do a post about a birthday brew. As nobody but one of my readers knows, my youngest daughter was born in mid-February 2012. She's an excellent kid, very sweet and personable but independent and daring. I look forward to seeing her grow up, but in many ways I don't want to think about what kinds of crazy things she'll do. Hopefully she maintains that reserved aura of danger, that I may never have to learn of such things. Be that as it may, she's now 3, and in her honor, I cooked up a fine birthday beer. During the winter she became attached to oatmeal, a fine breakfast food that can also be included in such things as oatmeal stout. Not surprisingly, then, I thematically made an oatmeal stout. This is an updated version of the one I made on her first birthday -- the stout is, of course, a common theme in winter, and oatmeal is a common theme for babies -- and, because I'm Like That, I mixed it up a little bit by making the Mother of All Confusing Beers: a Black Oatmeal American Pale Ale. Presumably there's some kind of melting pot thing going on. Without further ado, the recipes! McGee's Oaty Beer Mash volume: 10 gal Boil volume: 21 gal Mash temp: 155F Fermentation temp: 64F 29.2 lb German Munich 4.0 lb Crystal 120L 4.0 lb American 6-row 2 lb Chocolate 2 lb Roasted Barley 6.0 lb Oatmeal (rolled, not quick) 0.5 lb German Carafa Hops 3 oz East Kent Goldings FWH 2 oz EKG @60min 2 oz EKG @10min Yeast S-04 Mash in @156F, start sparge @150F. Unfortunately, I suffered an initial issue with stuck mash when drain system fell apart and grain blocked the exit. I removed a large amount of the (hot) mashing grain to expose the opening, cleaned the drain system, reassembled the system (more solidly this time), and re-attached it, then added ~1 gallon of additional liquid @170F to the mash to ensure the drain would not be blocked while re-introducing the rest of the (still hot) mash. I put the grain back in, and <i>viola</i>, it yielded the result I needed. <i>Note: The "base" is made with all but 3 gallons of the “central runnings” -- the first 6 gallons and last 12 gallons are infused with the 3 oz EKG FWH. The middle 3 gallons (gallons 7-9) are siphoned off. The result is ~18 gallons of liquid to boil using the hop schedule given above.</i> This ultimately yields ~12 gallons of usable stout after boil and about 4 gallons of additional liquid that will form the basis of the Black Oatmeal American Pale Ale (see below). The color of this beer is crisply black at the center with a lip of dark brown. Flavor prior to boil was a sweet front, dry back, a little bit chocolatey. There's a substantial feel on the tongue initially, which then washes away. The final MOB product is thick, roasty, a little chocolate, a little caramel. It's not boozy -- about 5.8% -- but you know it's there. On remake, I would (a) thin the mash bit; (b) lower the chocolate volume; (c) up the Carafa volume to get more of that dry (not bitter) roast. 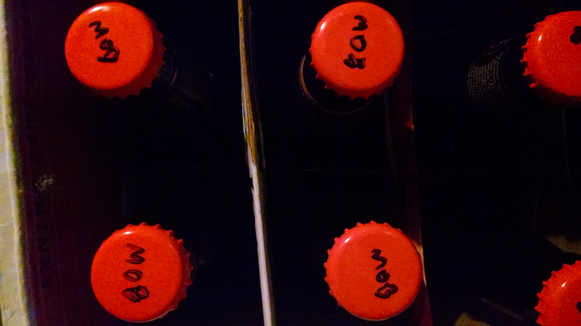
Black Oatmeal American Pale AleWe now have 3 gallons of middle runnings (as yet untreated) and 3 gallons of boiled stuff. For the as-yet-untreated liquid, boil separately and infuse with: 1 oz Warrior @60min 1 oz Warrior @flameout Yeast: Nottingham. Heading into the secondary after 10 days, this got an infusion of: 1 Oz CTZ (Columbus) 1 oz Simcoe 1 oz Centennial The yeast here is a little more mineral -- I can only assume this is due to the yeast because all items were fermented @64F (or thereabouts, given the vagaries of winter temperature stability in my basement). The additional hops make for a slight bitterness and a little more characteristic floral and barnyard flavor that makes this a little more like eating oatmeal in your grandmother's kitchen rather than in a sterile, modern space. I appreciate the complexity here, and at 5.4%, this one is homey and drinkable. As a bonus, while cleaning out my brewing area, I also came across my oldest daughter's 3rd beer label. At the time, my youngest had just been born, and the oldest insisted on calling her baby sister "Little Elephant". The beer's name thus became "The Monkey and the Elephant". 
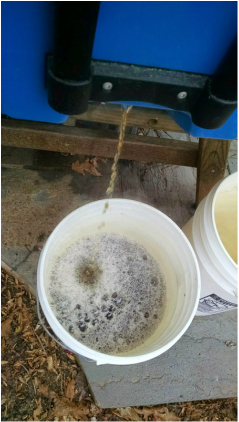
 It's getting colder, and to me that means it's time for Winter Ale. I prefer mine malty, a little higher-alcohol than a standard ale, with some pine and citrus. I want it to evoke forests and mandarin oranges and fireside. But it's also late fall, which means my wife still feels it's pumpkin season. Pumpkin pie and pumpkin beer just seem to go hand-in-hand. But I'm not looking for pumpkin pie beer, ust a beer that reminds us that pumpkins are a unique and wonderful adjunct. With that in mind, I went back and looked at my previous pumpkin and winter ale recipes. My favored winter features Northern Brewer, Cascade, and Tettnanger hops in a ~6.5% base of 2-row, 90L, Gambrinus honey, and chocolate malts. My favored pumpkin uses 2-row, 80L, 90L, and Victory to complement the pumpkin juice and very mild nutmeg/clove spicing. The Victory is in such small quantities that I felt it could be excised. The Gambrinus, then, needed to be featured to keep the pumpkin flavor interesting, and the chocolate had to stay to give that earthy undertone to the winter ale. The good thing about a spiced pumpkin ale is that the combination changes the profile of the entire enterprise, allowing both hop and malt flexibility underneath. One other consideration: our homebrew club handed out hops a couple months ago, and I ended up with 1.5 oz of whole leaf Nugget. That's been in the freezer ever since, so it's time to use it. The recipe below is a little convoluted, but it follows serially how I made the beer.  Pumpkin Ale Aduncts: 20 lbs pumpkins (Calebrese) Quarter pumpkins, bake @ 250F for ~3 hours. Reserve the liquid put off by the pumpkins. Separate the pumpkin meat from the shell. Shred the meat and press through a strainer if desired, again saving any liquid. Total liquid should be 1/2-1 gallon. Don't worry about getting it all out of the meat. (I froze the juice, because it's not needed for the boil and would have overflowed my system.) Base Ale 30 lbs 2-row 4.5 lbs Gambrinus honey 1.5 lbs 80L 1.5 lbs 90L 0.75 lbs Medium chocolate (British) Boil volume: 22 total, 18 to boil (see pumpkin ale segment below) Final volume: 16 gallons Mash @ 152-154F. If batch sparging, take last 4 gallons of 2nd running for pumpkin ale (see below). If continuous sparging, take gallons 12-16 for pumpkin ale (see below). Pumpkin Ale Put pumpkin meat in a nylon bag. Boil the 4 gallons reserved from the previous step along with the pumpkin meat for a minimum of 50 and maximum of 75 minutes. Base Ale Boil the base ale liquid using the following hop schedule: 2.25 oz Cascade (fwh) 1.5 oz whole Nugget (60min) 0.75 oz Northern Brewer, 0.5 oz Tettnanger (20min) Pumpkin Ale At flameout, take 5 gallons of the Base Ale to add to the Pumpkin Ale's 3-ish remaining gallons. (This volume is in the carboy in the pictures below.) Add the pumpkin juice to the boiling Base Ale. (This is done in a bucket sitting just off-camera in the top picture below; it's the input to the chiller setup.) Recall that I froze the juice (~3/4 gallon total liquid), so this will start the cooling on the boiling wort. Wait until that's all liquid, then VERY QUICKLY run it through the chiller. The cold break needs to be aggressive to drop the solids out of the solution here. I needed 3 runs through the counterflow chiller with ground water around 55F and put through an additional pre-chilling ice bath; this water was probably about 40-45F, and the final wort temperature was a little over 60F. Yeast is 1056 (American Ale) This recipe makes 9 GALLONS of pumpkin ale After 2 weeks, add "pie spices": 1 tsp nutmeg, 12 cloves. Winter Ale For the remaining gallons, add 0.75 oz Centennial and 0.25 oz Simcoe. Let sit while you cool the pumpkin wort. (In the image with the pot below, the hops have already been added.) Once done with the pumpkin wort, chill this wort to pitching temperature. This took 2.5 runs through the chiller shown below, with the same specs as given in the Pumpkin Ale section above; final wort temperature was about 66F. Yeast is 1968 (London ESB) This recipe makes ~11.5 GALLONS of Winter Ale 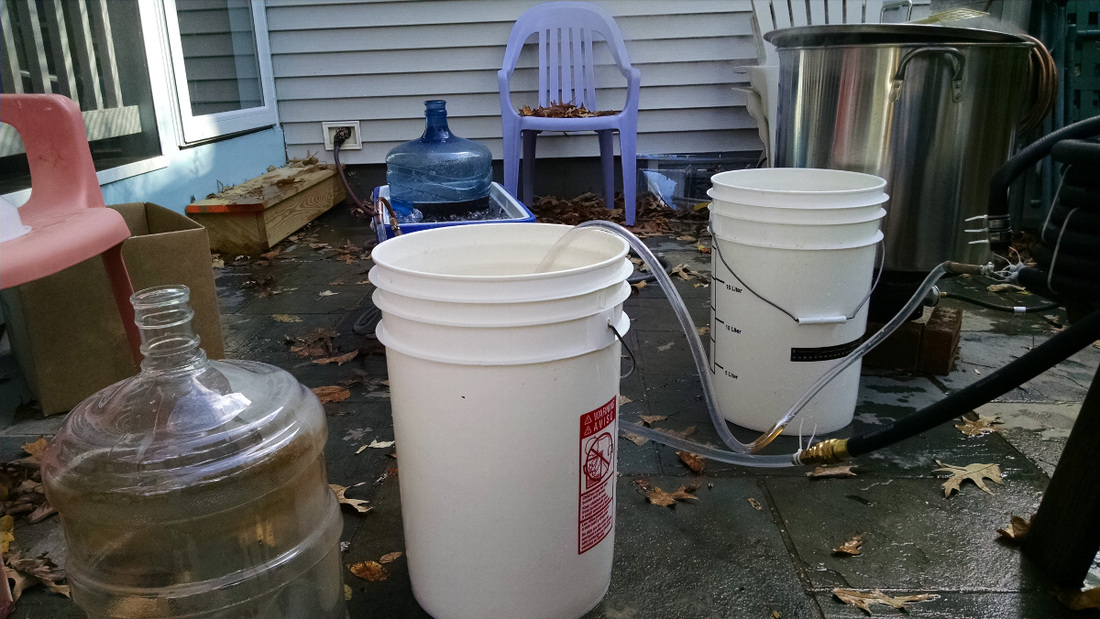
After brewing, it became apparent that the wort was a little dark. This may have needed light chocolate instead of medium chocolate. I might also have dropped it to 0.5 lbs instead of 0.75, but we'll see what the flavor is on the back end. I also prefer the slightly smoky flavor of the medium chocolate.
After 2 days in the fermenter (~66-69F), both are going well. The winter smells lightly of citrus and pine, and it's got an earthen quality, probably from the Simcoe. The pumpkin smells mildly of pumpkin; it's not overwhelmed with the hops, just has enough of them in the background to make the entire enterprise smell pie-like. Enjoy the smells and tastes of late fall. I know I will! Mash out. Spin on. Fall is here! The weather is crisp and cool! It's time for a pumpkin beer!
While the commercial world has had its pumpkins out for months -- this year we picked some up in early September -- the homebrew world is not so constrained. As a brewer, I delight in turning seasonals on their heads, brewing farmhouse beers in winter by opening the appropriate heading duct; making Maerzens that come out in October; and flooding the world with pumpkin beer well after the prime pumpkin season. So it is with no regrets, qualms, or reservations that I will be brewing a pumpkin beer this week. Alas, the local brew shop is closed on Mondays, or I'd be starting tonight, but my random assortment of grains isn't up to the task the way it was last time. (I'd consider the amazing Oktoberfest brewed two months ago to be a triumph of grain remainders, as I pulled together 16 gallons by buying just 2.5 pounds of grain.) Pumpkin beer apparently has quite the history in the US, and I'm only happy to add to that history by producing Yet Another Pumpkin Ale. It is, after all, my wife's favorite, and the spices let me tinker with the base recipe without significantly affecting the final flavor. That having been said, this year will be something of a departure. Where previously I had used a "standard" ale recipe -- mostly 2-row with a small amount of caramel and cara-vienna for some texture and color to back up the pumpkin -- this year it's going to be the Winter Warmer recipe. In the commercial world, this is a mortal sin. I'm not only changing the recipe, I'm shifting it dramatically from a purpose-built pumpkin ale to simply a winter ale with some pumpkin and pumpkin spice in it. Seems like quite the change. But I have good reason for doing this. And besides, this is homebrew, where experimentation is one of the delightful benefits. So why the shift? This is predicated on two very simple, but very compelling, arguments. First, the pumpkin beer is so heavily doctored that the base ale simply needs to provide a backbone. There's nothing fancy about this, and indeed the more complex the base flavor, the worse off you are, because ultimately the pumpkin spice and pumpkin will overwhelm it. This is even true in he small spice volumes I stick to (~1-2 tsp of spice total per 5 gallons; this is about 1/6 of what many online recipes call for). But why the winter? Because that's my favorite of the season. And since it's relatively high-alcohol, I can make a mini-mash with pumpkin only, add it to a part of the winter mash, and have a full 2-batch brew in a single go. The only problem, then, will be partitioning the wort appropriately, either before or after the boil. All that having been said, though, Thanksgiving is still pumpkin time. So shut your pie hole! Mash out. Spin on. |
AuthorA bike-riding brewer. Archives
September 2016
Categories
All
|


 RSS Feed